Zalo Integration
This guide will help you connect your personal Zalo account with Conductify AI Agent. Follow these steps to ensure a smooth and successful integration process.
Part 1: Setup in Integration Browser
If you don't have Integration Browser, refer to here
Step 1: Access Zalo Web Chat
- After creating a profile, open the profile then access to
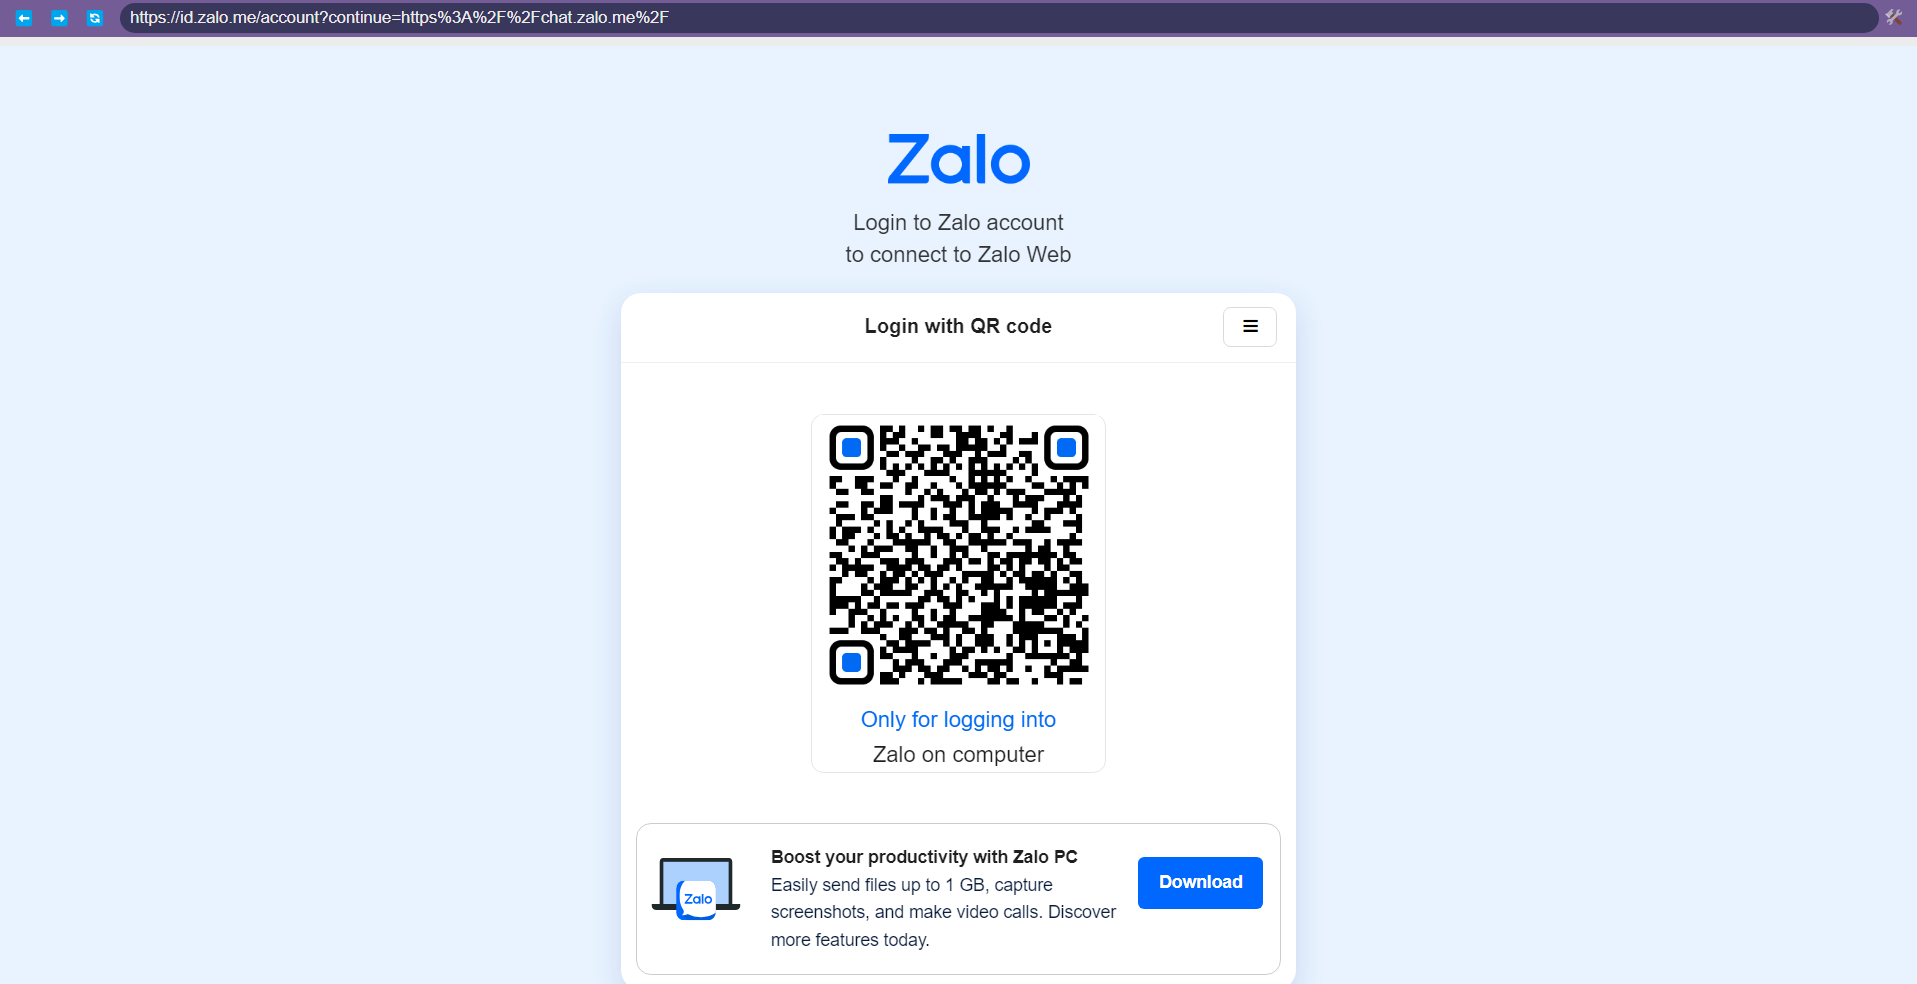
https://chat.zalo.me
Step 2: Login
- Login to Zalo Web by scanning the QR code using your phone's Zalo app that's already logged in.
Each account can only be logged in on one device at a time.
Part 2: Setup in Conductify AI Studio
Step 1: Access Conductify AI Studio
- Access Conductify AI Studio
- Login or Register if you don't have an account
Step 2: Add Integration
-
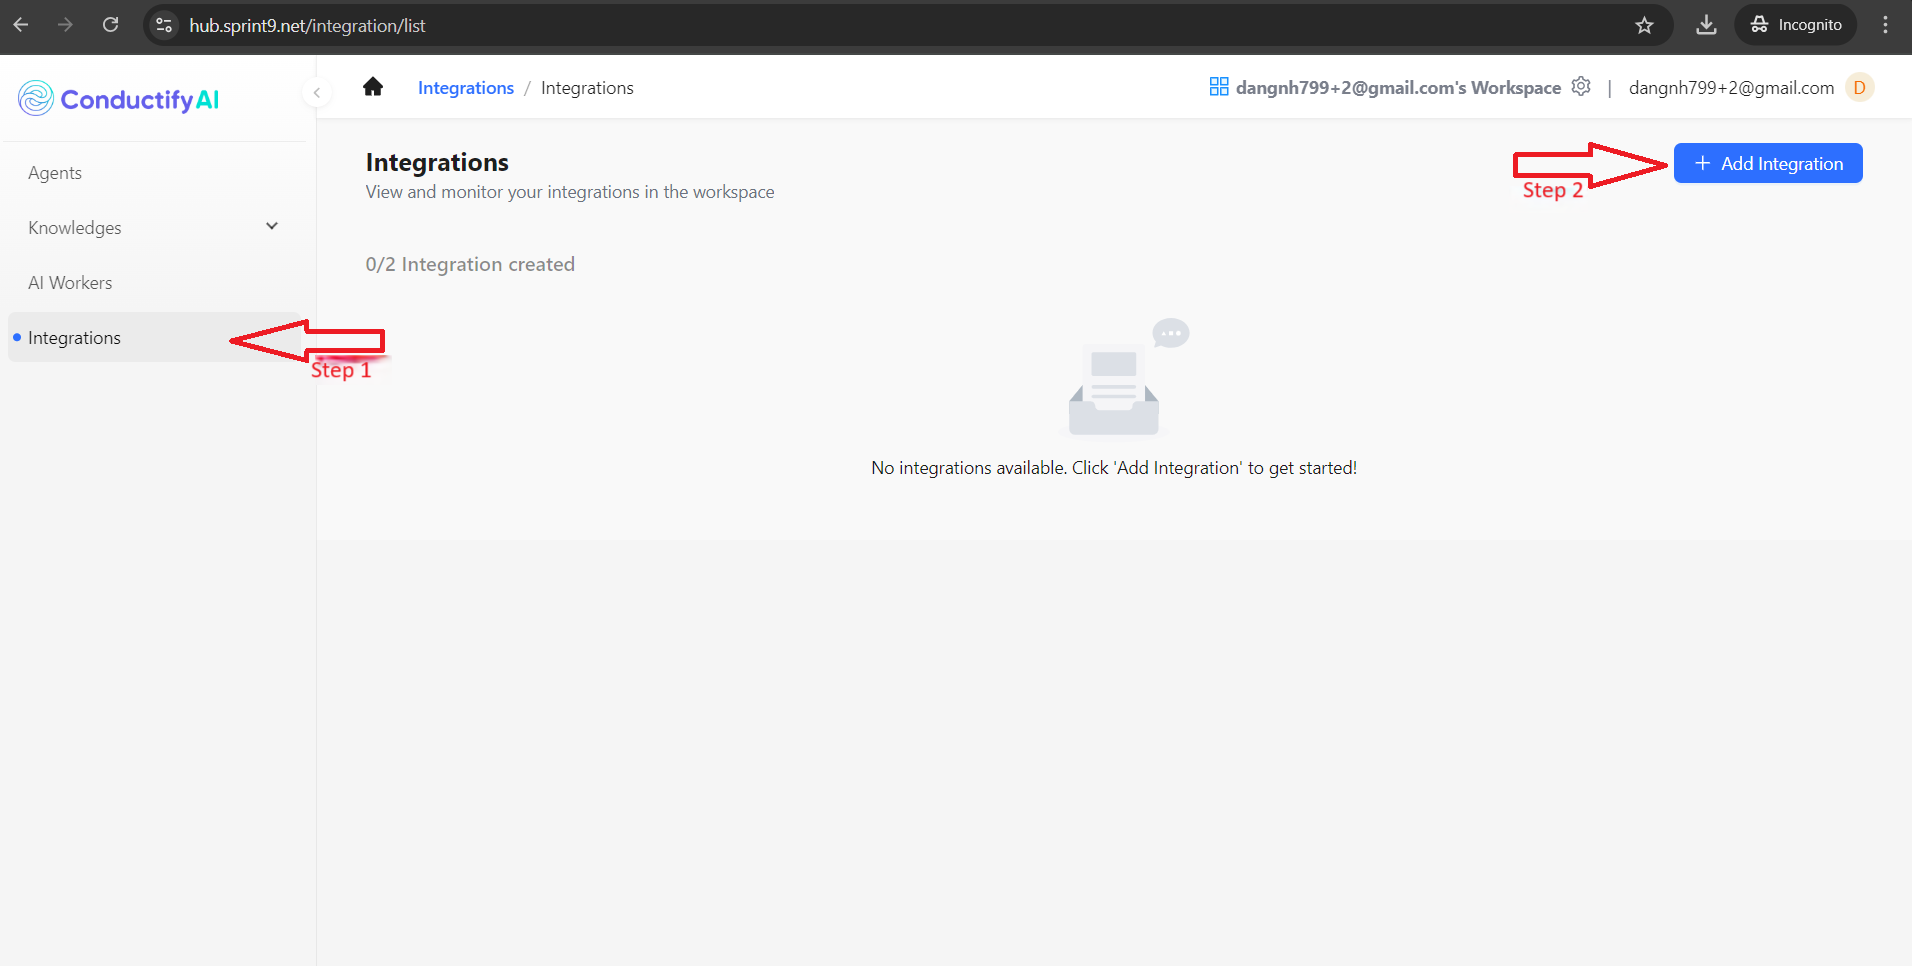
On the main interface, select Integrations from the left menu and click the Add Integration button
-
A new window will appear with 3 required fields to create a new Integration:

- Integration Name: Name of Integration, can be customized (example: "Zalo John Doe")
- Integration Type: Select Integration type (in this case, "Zalo")
- Integration Account: The Zalo phone number for which you want to create the Integration
-
After setup is completed, click the Create button to create the Integration
Step 3: Configure Integration
Ensure that Integration is fully functional and productive, you must have 1 AI Agent created beforehand.
-
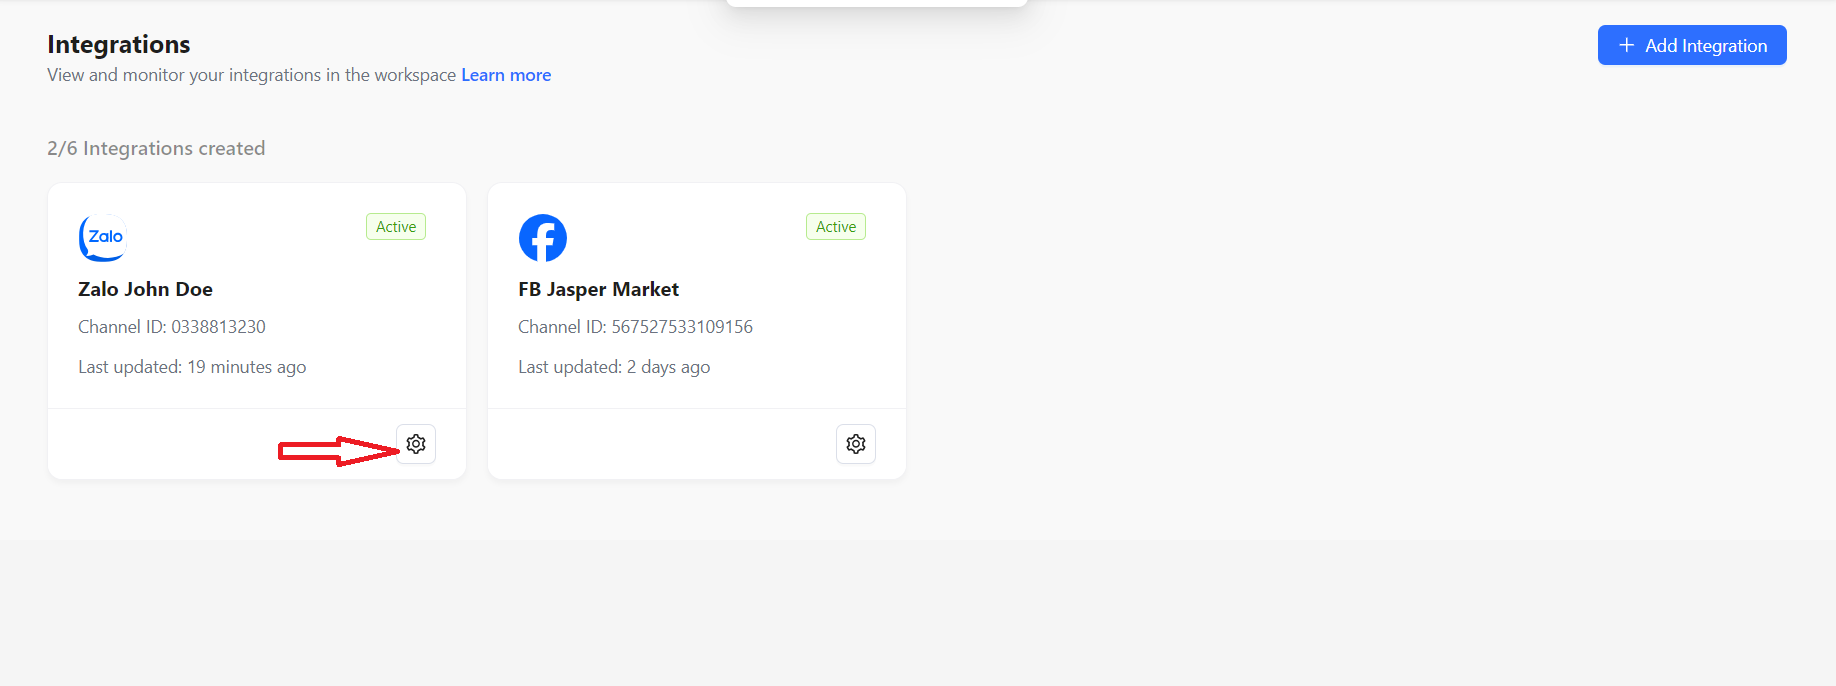
After successfully creating the Integration, click the settings icon to configure the Integration
-
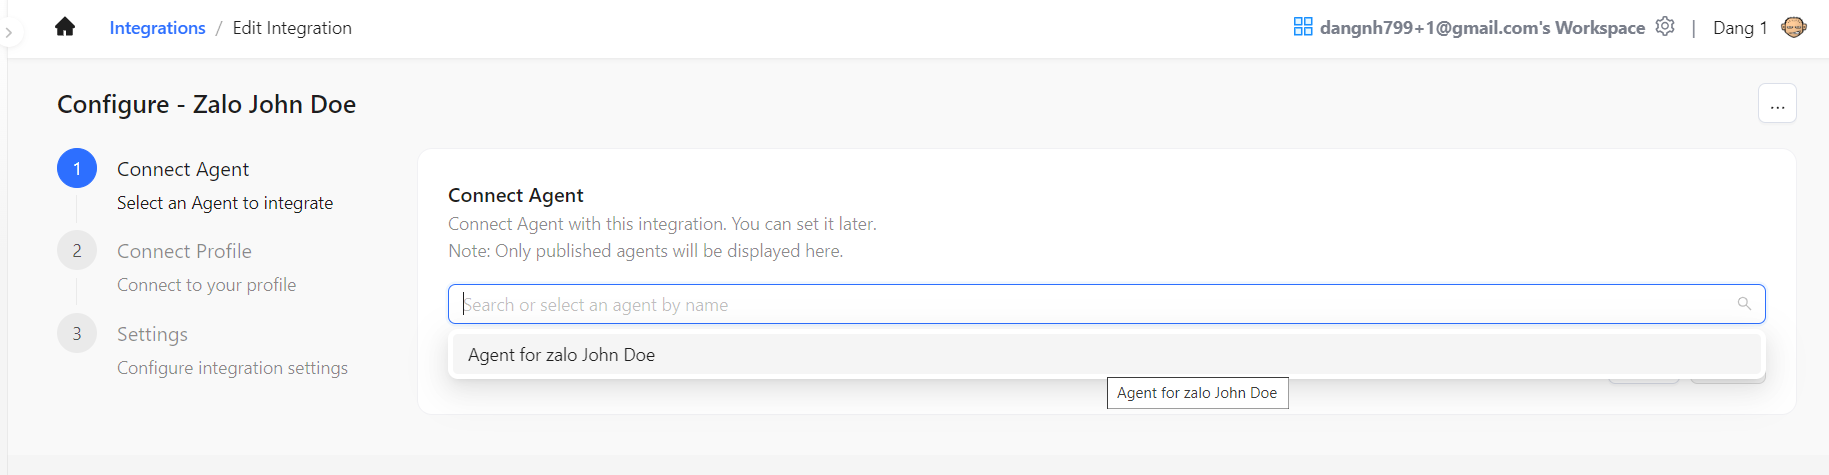
In the configuration interface, there are 3 steps to complete the setup:
-
Connect Agent: Link to an existing AI Agent (can be added later)
-
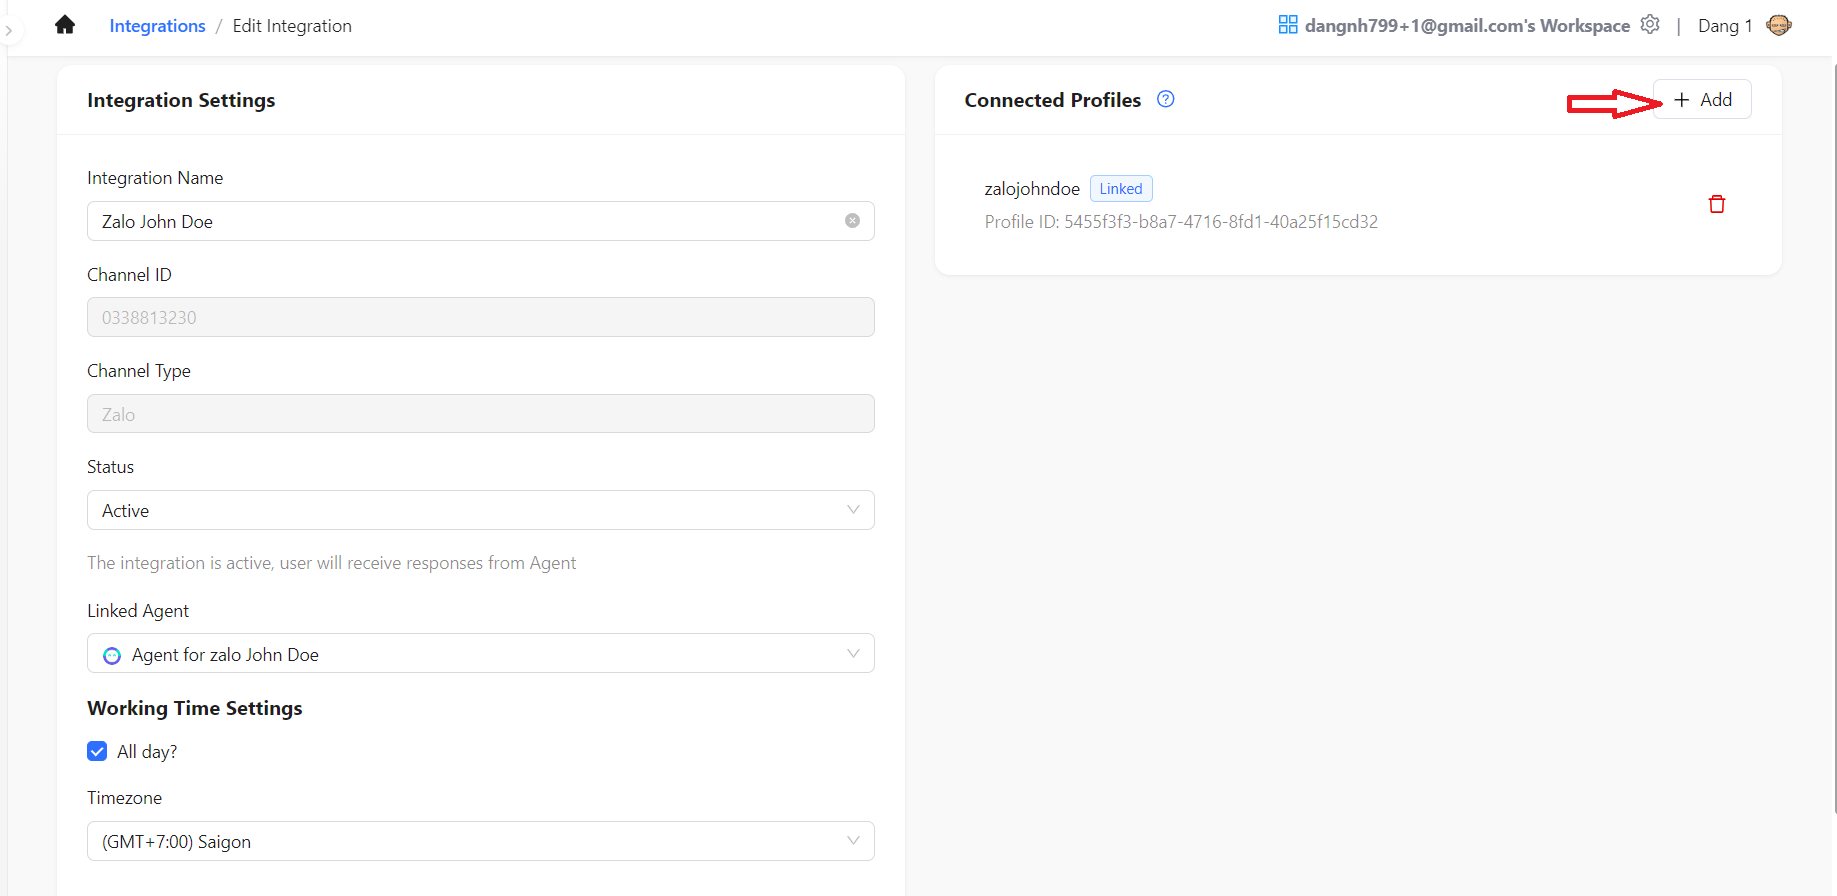
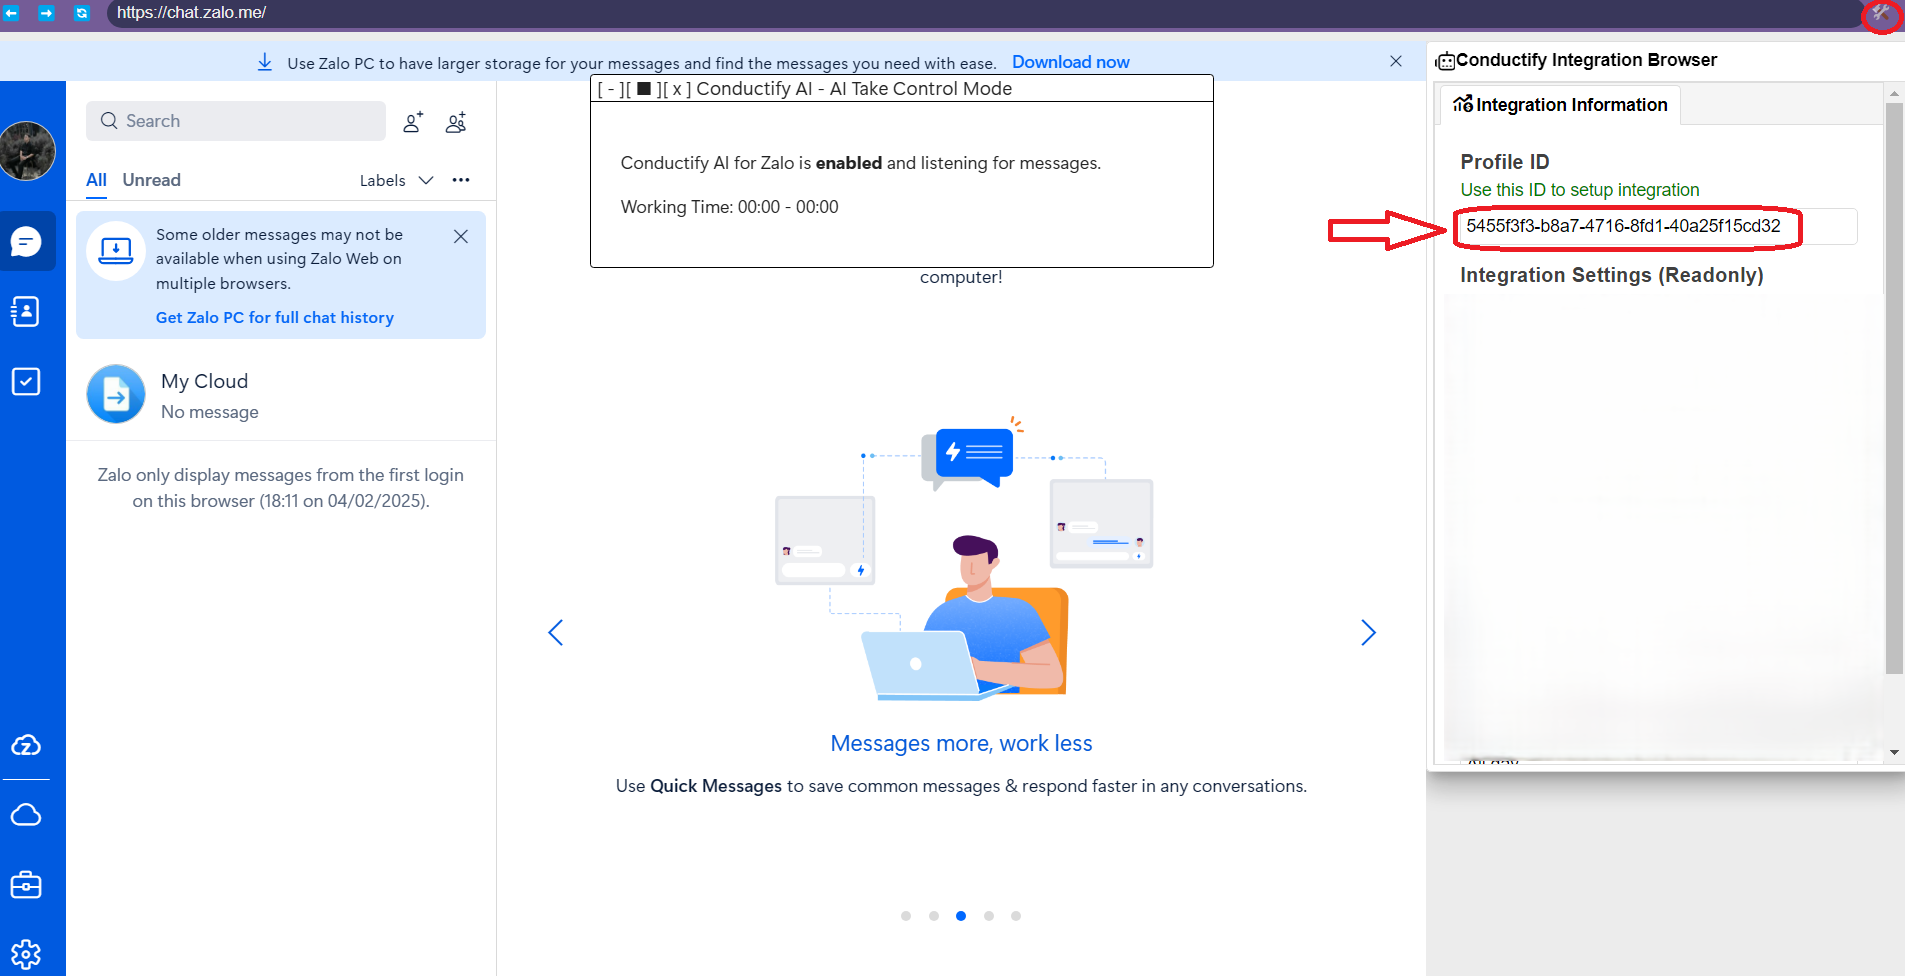
Connect Profile: Link to the Profile created earlier in Integration Browser by:
- Click the wrench icon in the top right corner of Integration Browser and copy the Profile ID
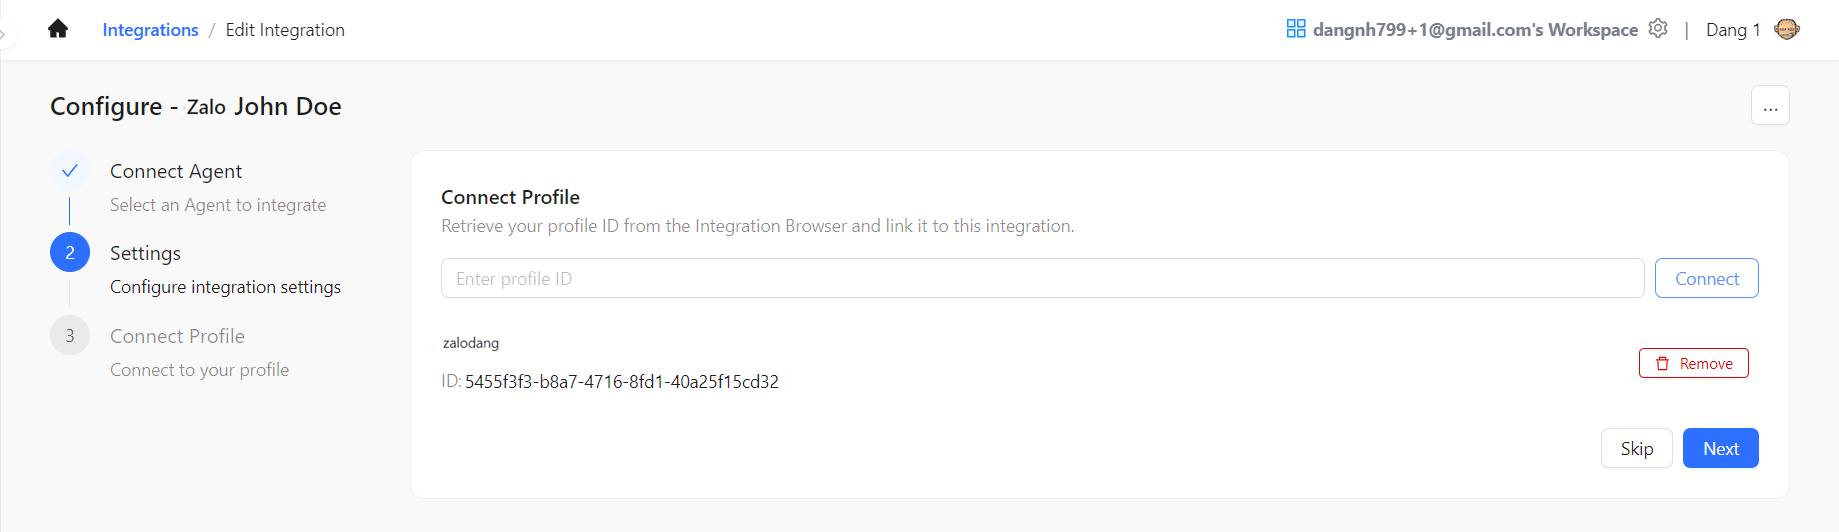
- Paste the Profile ID into the Connect Profile field and click Connect
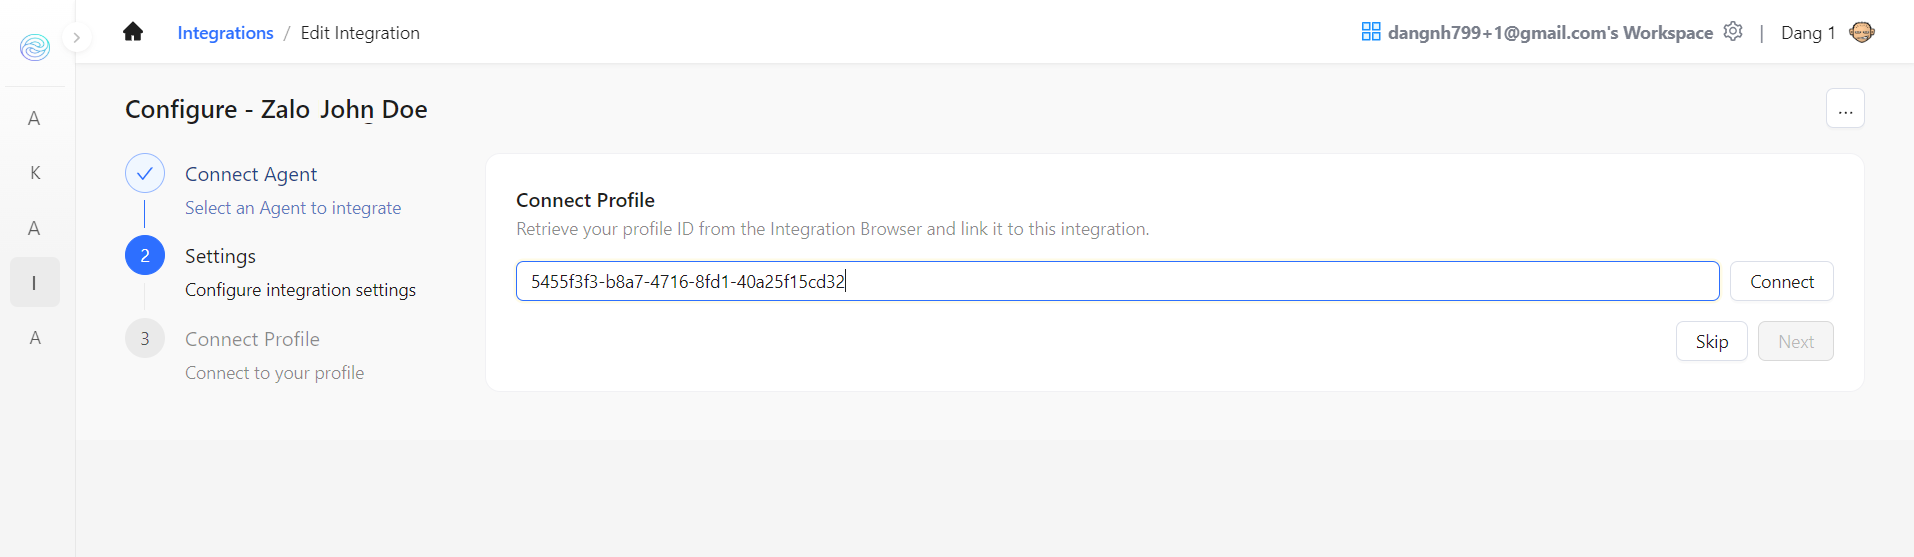
- After successfully connecting to the Profile, check the Profile name and Profile ID, then click Next
- Click the wrench icon in the top right corner of Integration Browser and copy the Profile ID
-
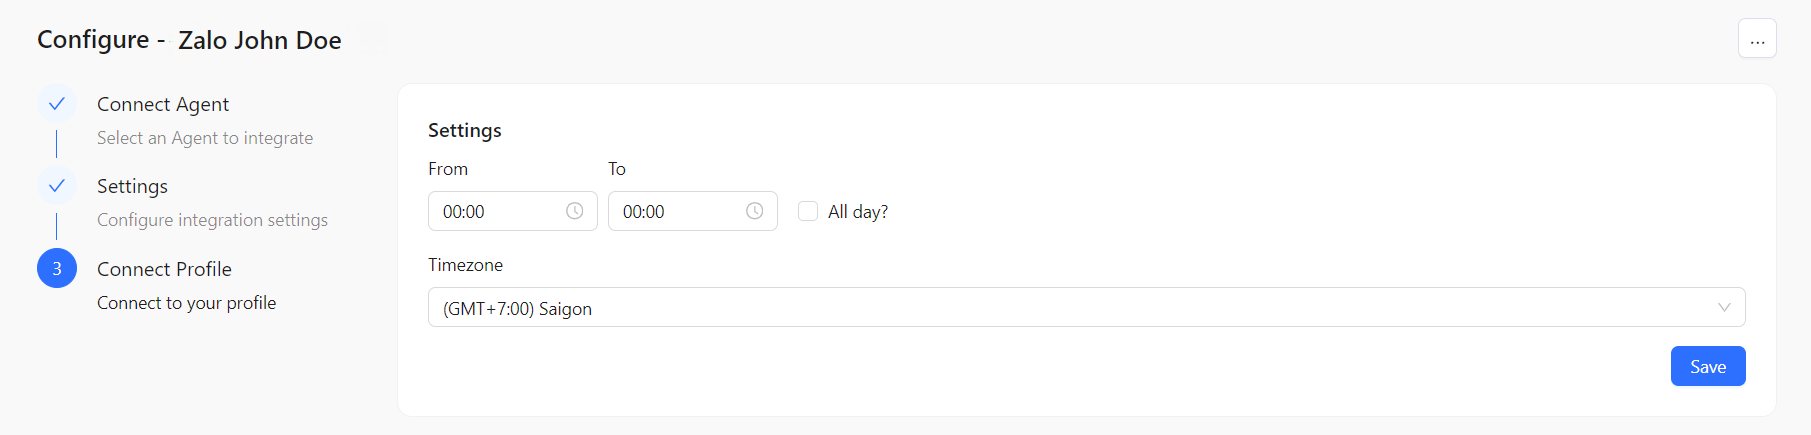
Settings: Set the operating hours for the Integration
-
-
After completing the steps, click the Save button to save the configuration
-
You have completed all steps to create a Zalo Integration. You can click the settings icon to check or modify any necessary information.
Due to Zalo Policy, each Integration can only have maximum 1 profile.